Labels

Showing posts with label Decor. Show all posts

Thursday, September 25, 2014

DIY:: Dining Area Update & Re-upholstering The Chairs

It was time to update the dining area. It just was. The brown-ness of it all was screaming for a major change! 
So this is what I envisioned:
  • Incorporating white to bring in some light
  • Metallic gold to add a glam quotient
  • And bringing in some pattern for the seats. (Floral pattern got a big No from my husband as its too girly. So we decided to go with geometric- trellis which we both like!)


Here’s the BEFORE of the dining area


Supplies: I got the fabric from Joann’s and rest of the things from Amazon


Step 1: Prime
The table surface is not smooth because of its inherent ridges. So I decided to prime before going in with the color to get an even application. 
After first layer of priming.


Step 2: Paint
After two layers of semi-gloss white paint.


Step 3: Gold leaf finish
This little tube of rub-n-buff goes a long way. I just took some between my fingers and started buffing it on the metal legs of the table and the chairs. I recommend wearing gloves while using this. I did not cover the metal completely with the gold just to give it an antique finish. It seems as if the gold is peeking through!


Step 4: Re-upholster

Here's the fabric 
Unscrew the seats and place them inverted on the fabric. Staple the sides to the seat base. Make sure to pull the fabric taut while stapling. Screw the seats back to the chair and its done!


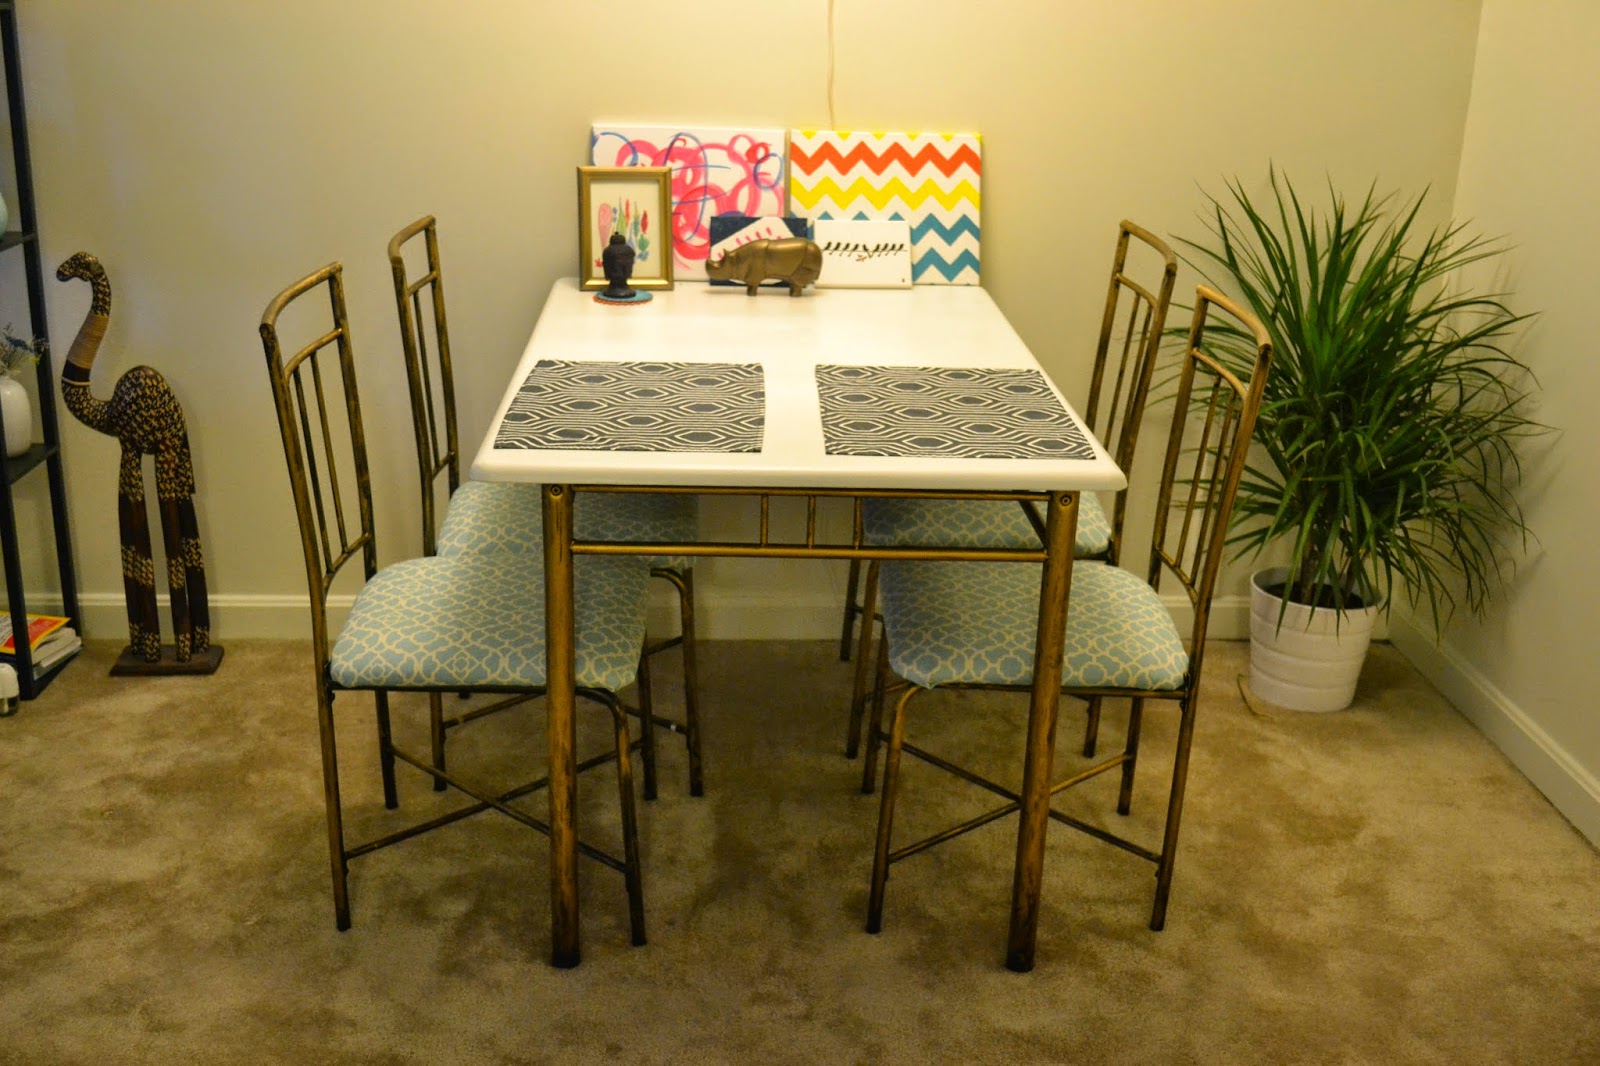
 Here's the AFTER:


That’s it. As good as new! I love how the white makes it look so much lighter and the combination with gold is such a classic. Plus the pattern makes it so much fun!

Monday, August 25, 2014

DIY Headboard:: New addition to the Bedroom

This was a totally random DIY, inspired by Danielle Oakey’s post on DIY headboard.  I am always up for a fun project; especially when it involves fabrics!! So lets jump right into it.

Supplies for a King Size Headboard:

Plywood (7/16 inches thick) cut to size 4ft x 6ft $9
Batting (4.5 yards) for 2 layers $10 (Used 50% off coupon)
Fabric (2.5 yards) $12
Heavy duty industrial staple gun 

I got the plywood from Home Depot and rest of the supplies from Joann’s.

The steps are super easy and straightforward.

Place the plywood on batting. 
Staple the first layer. 


Then staple the second layer. Keep the batting in place by holding it taut. As you can see, I ran a little
low on the batting towards the shorter sides but it turned out ok. Also, you can add more layers of batting depending on how plush you want your headboard.


Then place the whole thing on the fabric. Again staple it till you feel its secure. If you have excess fabric, you can cut it. I just folded it over and stapled it.


The headboard is ready!


We just put it on the bed frame and pushed the mattress against it so that its propped up against the wall. I absolutely love the ikat backdrop and the whole aqua-blue-white color scheme!
The whole project cost turned out to be $31!! Cant beat the price plus the result is totally worth it!!

Tuesday, July 15, 2014

Vanity Makeover

I love color and I am not a big fan of all-shades-brown furniture that is available in stores (dont get me wrong, sometimes you need that neutral but sometimes you need some fun as well!).

Enter Spray paint!

Using spray paint is such an easy way of making something unique and that too of your choice.

While I was browsing my color options, I thought why not go with the 'gloss' option, so I ordered this rust-oleum paint in 'Gloss Apple Red' from amazon.

Here's a quick before and after of my so-called vanity. It was so easy and the result is a nice pop of color in the room.


BEFORE


AFTER (spray painting the heck out of it)


I added a touch of antique gold acrylic paint on the knobs and it was good to go.
It definitely makes a statement! What do you think?!


Thursday, May 1, 2014

DIY :: pom-pom trim drapes

Hey guys!

My white drapes were looking pristine but a little boring so I was browsing online , looking for ideas just to jazz 'em up a bit. I came across this widely published idea of adding pom-pom trims!
Its nothing new; you'll find lots of posts on it but I decided to share my version. Its fun, easy and best part- no sewing!!


Things you'll need:
  1. Drapes to work with (ofcourse!)
  2. Pom-pom trim. I got mine from ebay, quite inexpensive ,$3.50 for 5 yards
  3. Fabric glue


Line up the trim on the back of the drape and start applying the glue. I used some paper clips to keep the trim in place till it dried. 


That's it! Finish the whole length, let the glue dry and you have your pom-pom trimmed drapes!


Easy way to spruce up things. If you have extra pom-pom trim lying around, you could use it on a pillow case, throw, lamp shade etc.. 
Let me know what you think of this.

Thank you!
A